Making
a Raven’s Cove Baronial Sheet Wall
Gather materials
needed:
A. 1.5 yards of white canvas
B. Yard Stick Ruler
C. Fabric paint in your colors,
black, and gold.
D. Template of your heraldry that will
fit a heater shape of 22”x29”
The
finished sheet wall will be approximately 48”x48”.
A. Fold the edges of the canvas so that
you have a 48”x48” square
B. Finish the edges with a narrow hem
all the way around
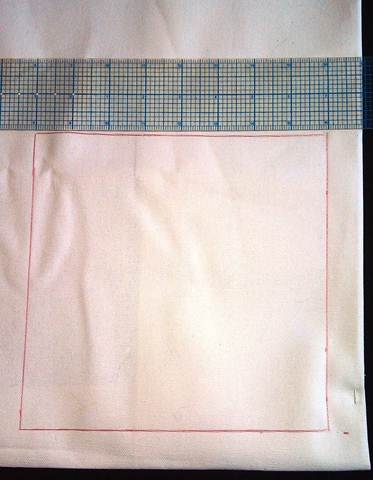
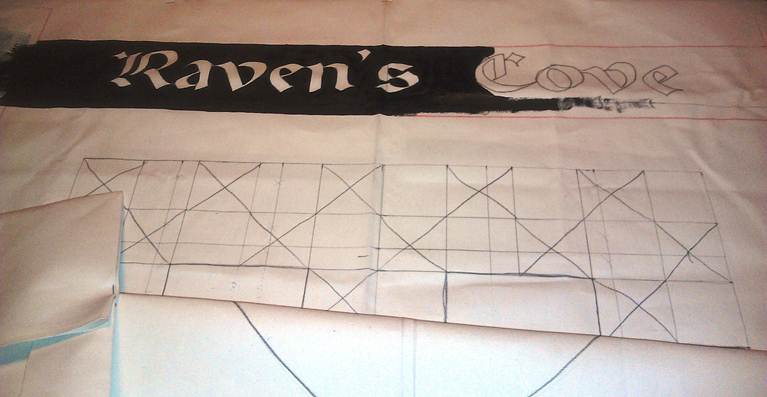
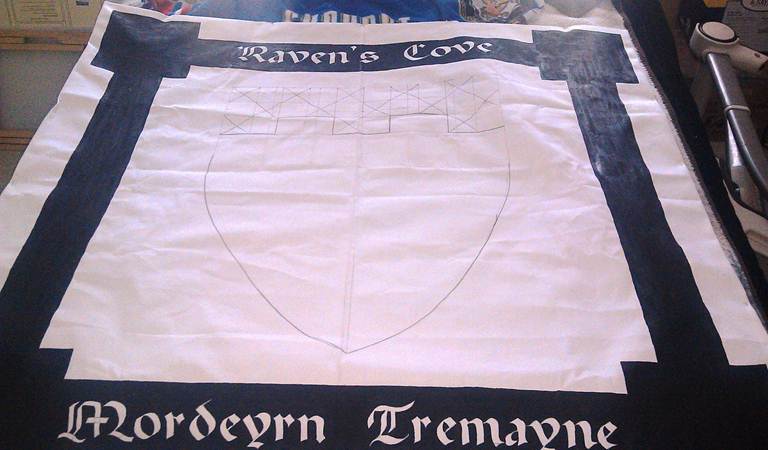
1. Frame.
The frame for the Baronial Sheet Wall is
Black consists of an 8” x 8” square in each corner connected by 4” wide stripe
to make a complete frame with the words “Raven’s Cove” in the top stripe, and
your name in the bottom stripe.
A.
Measure
and draw an 8” x 8” square in one of your corners, one inch from the edge.
B.
Make
a mark two inches in from the square’s edge on each of the sides that will
connect with another square (so, not the outside edges, but the inside edges).
This will mark the 4” wide stripe that connects the squares.
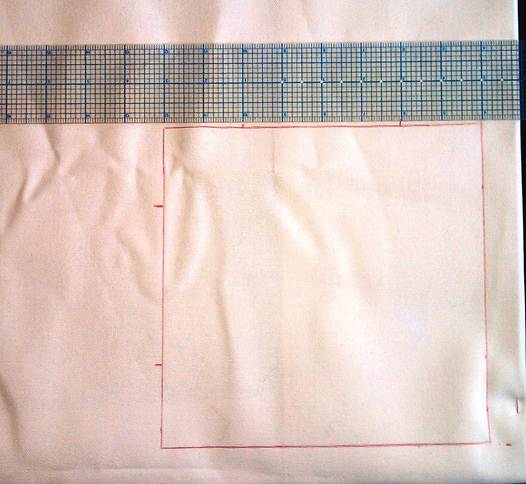
C.
Draw
8” x 8” squares in the remaining three corners with marks for the stripes.
D.
Connect
the squares so that you have a complete frame, one inch from the edge at the
corners, and three inches from the edge for the stripes.

E.
I
would suggest laying out the whole thing, at least to having the shield shape
in place before painting, you can of course paint the frame and party on, if
you do that at this point, paint the side stripes and all four corner squares
black. DO NOT paint the top and bottom stripe yet.
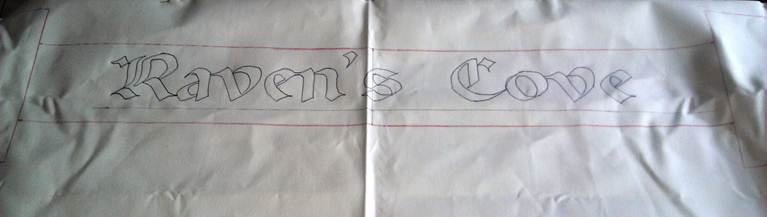
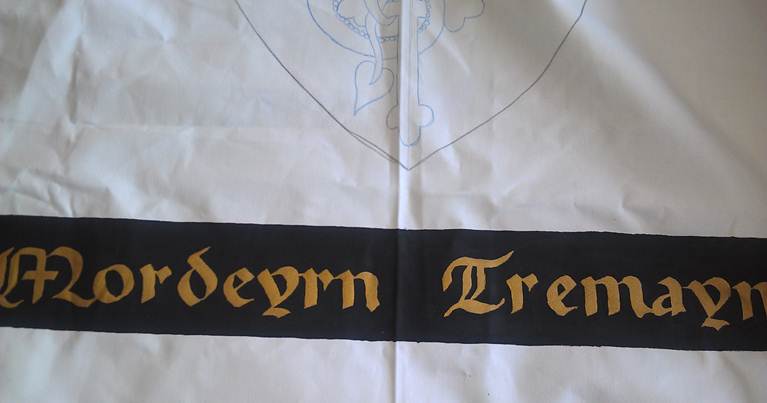
2. Lettering.
The top stripe should contain the
group’s name – Raven’s Cove. The bottom stripe should contain your SCAdian name.
A.
Center
the Baronial name on the top stripe and transfer onto the canvas.
B.
Center
your SCAdian name on the bottom stripe. You have 30”
to work with, and of course you want the letters to be no taller than 3”. Once
you have the right size letters, transfer onto the canvas.

C.
Again,
you can paint the lettering and the frame at this point, or continue the layout
as I did. I have a section for painting later.
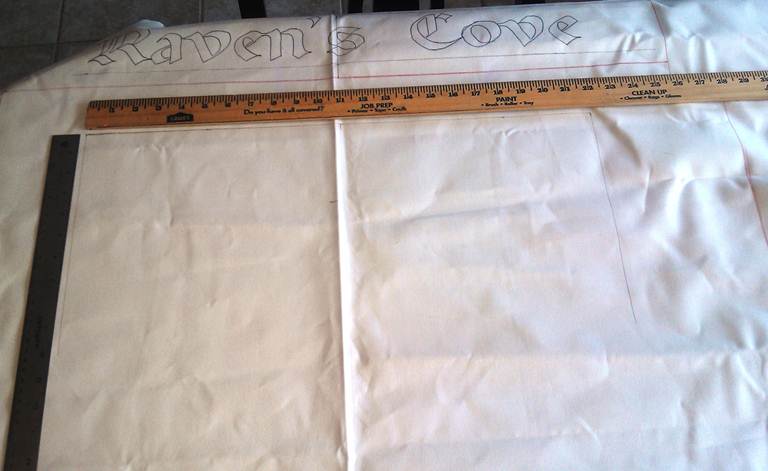
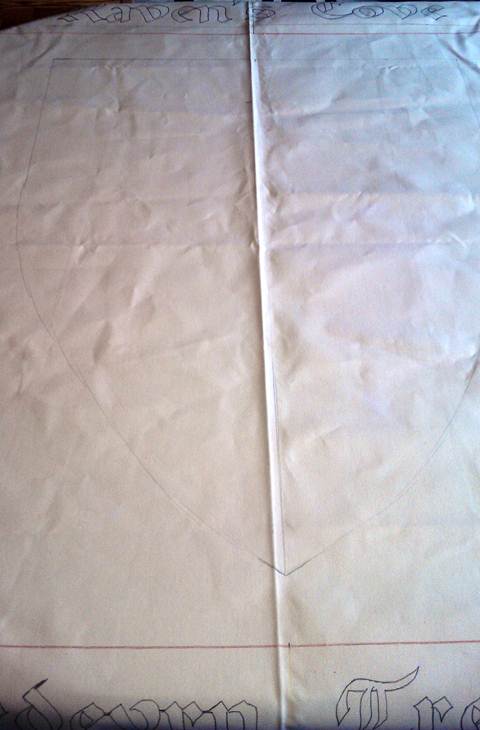
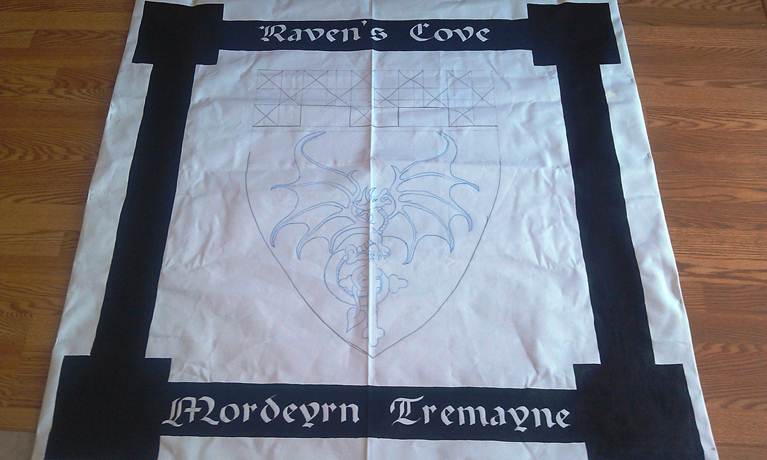
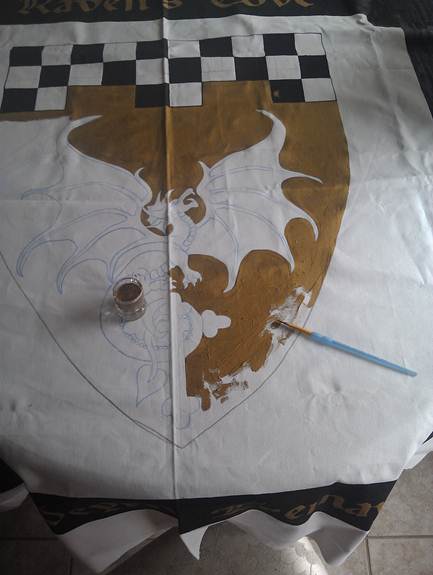
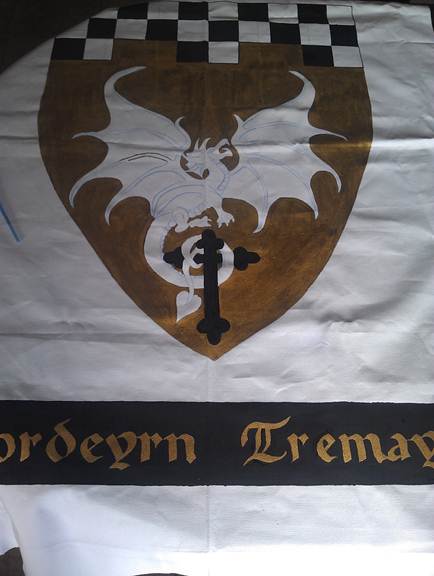
5. Heraldry.
The shield shape is a heater shape with
the top 22” and the centerline is 29”
A.
Find
the center of the banner (24” from either edge).
B.
At
center, measure 2.5 inches from top frame or 9.5 inches from top edge, and mark
it. That’s the top mark of the heater shape.
C.
At
center, measure 2.5 inches from bottom frame or 9.5 inches from bottom edge,
and mark it. That’s the bottom/tip mark of the heater shape.
D.
At
the top mark, draw a line that is parallel to the frame and centered on your
mark that is 22” total length, or 11” on each side of the center.
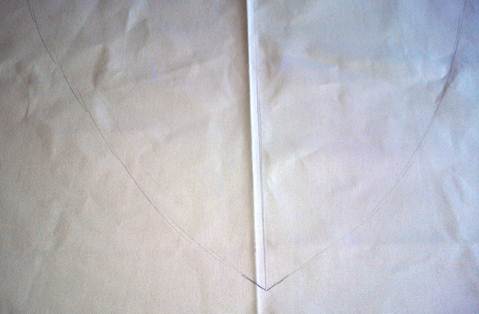
E.
Draw
a light line down the center to your bottom/tip mark.
F.
On
each end of the top line, draw a 10” line perpendicular to the top line to make
the sides of the heater shape.
G.
Rough
in an arc from the end of the 10” line to the bottom/tip to finish the heater
shape on one side. Repeat on the other being as symmetrical as you can.
H.
Draw
in your heraldry as you desire, either by transferring from a “to size”
drawing, a template, or free hand.

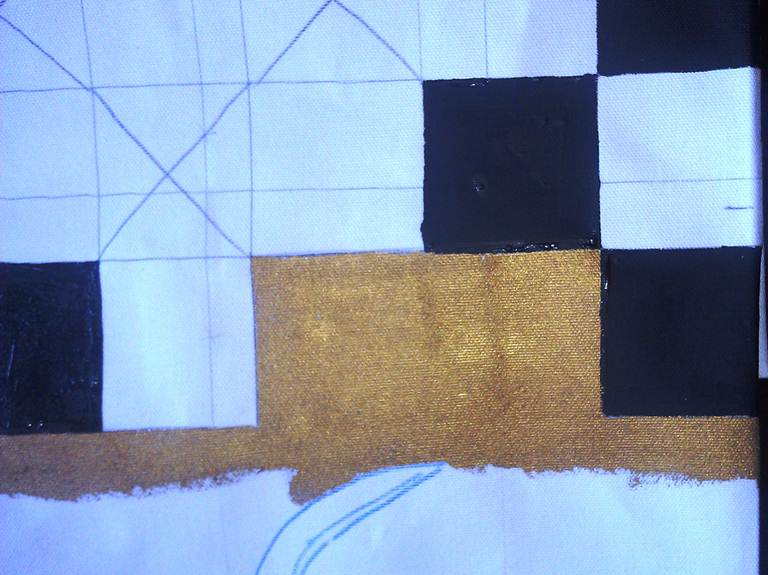
Note
that I messed up on my own checky, (yep,
really!) but since its in pencil, its ok, I just
had to make sure I knew what I was painting what, which is why I marked the
black checks with an “X” so I could follow which ones to paint. So, it IS ok if
you mess something up, just so long as you don’t put marks that won’t come out
in a place you’re not painting, and even then, its
still ok as this is white, white paint will cover a lot…
I
didn’t have my dragon template handy at this point, so, I didn’t draw it in
yet. I added after the frame was painted. Just had to wait for the paint to
dry… that’s a KEY point there, DON’T try to draw something in the center if the
outside is still wet…
6. Painting.
A.
I
started with the Frame, painting the black around the lettering.,
the entire frame is black with Gold lettering. I used straight Black Acrylic
Paint for all my black and #871 Pure Gold, Folk Art Acrylic
Paint for the lettering and my heraldry.
B.
Paint
the top stripe black around the gold/yellow lettering.
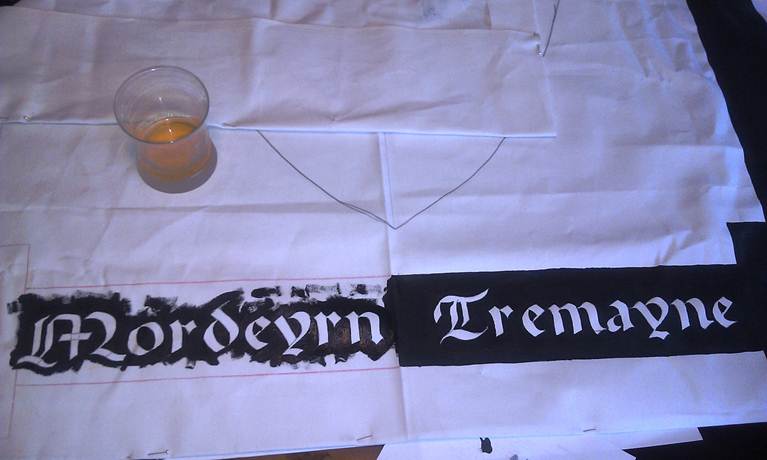
(Yes,
its scotch, neat, and cold, lol)
C.
If
you did it the same as me, now is a great time to finish penciling in your heraldry.
D.
Paint
the letters gold. I used #871 Pure Gold FolkArt
“PLAID” Acrylic Paint. (Deep mustard yellow can be used).
E.
Paint
your heraldry with its proper colors

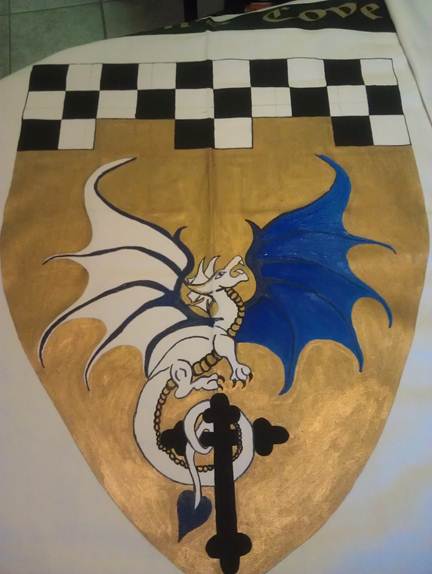
 ‘
‘
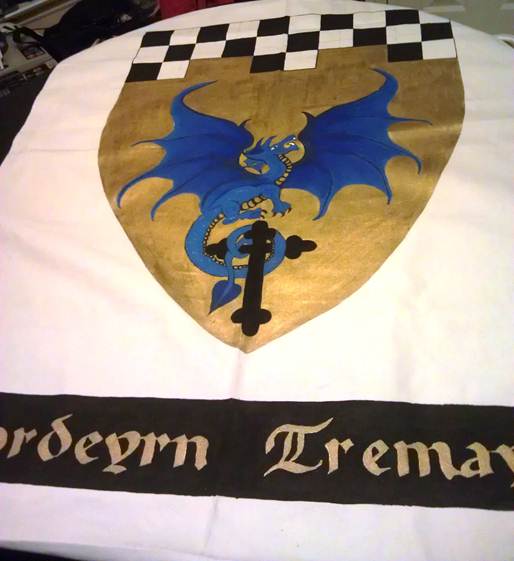
F.
Outline
the shield shape with black.
6. Grommets.
A. Use ½” grommets in each corner spaced
in from the edge at ¼” so it should also be ¼” from the frame.
ALL
DONE!
Display
with pride!